Advertisement
Optimization algorithms do a lot of heavy lifting in deep learning. They affect how fast your model trains, how well it performs, and sometimes, whether it trains at all. AdaHessian is one of the newer additions to the second-order optimizer family, claiming better generalization and performance in fewer steps. If you’ve used Adam before, you’ll find some familiar ground here—but AdaHessian doesn’t quite play by the same rules. Let’s look at how it works, how to implement it, and how it stacks up against Adam in actual results.
Before getting into the details of how to use it, it helps to understand what sets AdaHessian apart. If you’re used to first-order optimizers like Adam, you know they rely heavily on gradient values to decide the next move. AdaHessian introduces another layer—it adjusts updates based not only on gradient behavior but also on how that gradient is changing, using second-order information from the Hessian.
Now, full Hessian matrices are too expensive to compute for deep networks. That’s where AdaHessian uses a diagonal approximation to make the idea practical. It doesn’t need the entire matrix—just a directionally informed snapshot, which it gets from something called the Hessian-vector product.
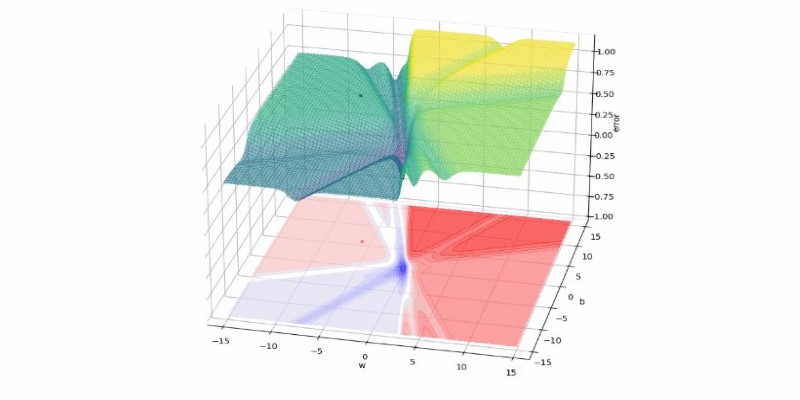
Unlike Adam, which adapts learning rates based on the moving average of gradients and their squares, AdaHessian adjusts based on curvature. This means it can sense when the terrain is steep or flat and respond accordingly. The sharper the region, the more cautious the update; the flatter it is, the more confident the step. That can result in faster progress where it's safe and more stability where it's not. This added context during training helps AdaHessian respond more intelligently to the optimization landscape, especially in deeper models or noisier tasks.
The implementation isn't overly complex if you've written custom optimizers before. It borrows many parts from Adam but adds some specific operations to deal with the Hessian approximation. Here's a simplified step-by-step guide.

Instead of computing the full Hessian, AdaHessian uses the Hessian-vector product (HVP), which is efficient and already supported in PyTorch through autograd.
python
CopyEdit
def hvp(y, x, v):
grad1 = torch.autograd.grad(y, x, create_graph=True)
grad2 = torch.autograd.grad(grad1, x, grad_outputs=v, retain_graph=True)
return grad2
This lets you estimate the curvature without ever building the full Hessian matrix.
Start from a basic Adam structure and add the logic for second-order scaling.
python
CopyEdit
class AdaHessian(torch.optim.Optimizer):
def __init__(self, params, lr=0.15, betas=(0.9, 0.999), eps=1e-4):
defaults = dict(lr=lr, betas=betas, eps=eps)
super(AdaHessian, self).__init__(params, defaults)
def step(self, closure):
loss = closure()
for group in self.param_groups:
for p in group['params']:
if p.grad is None:
continue
grad = p.grad.data
state = self.state[p]
# State initialization
if len(state) == 0:
state['exp_avg'] = torch.zeros_like(p.data)
state['exp_hessian_diag_sq'] = torch.zeros_like(p.data)
exp_avg = state['exp_avg']
exp_hessian_diag_sq = state['exp_hessian_diag_sq']
beta1, beta2 = group['betas']
# Get Hessian diagonal via HVP
v = torch.randn_like(p.data)
hess_v = hvp(loss, p, v)
hess_diag = (v * hess_v).data
# Update moving averages
exp_avg.mul_(beta1).add_(grad, alpha=1 - beta1)
exp_hessian_diag_sq.mul_(beta2).addcmul_(hess_diag, hess_diag, value=1 - beta2)
denom = exp_hessian_diag_sq.sqrt().add_(group['eps'])
step_size = group['lr']
p.data.addcdiv_(exp_avg, denom, value=-step_size)
return loss
This optimizer now makes use of the local curvature through the estimated diagonal of the Hessian. The final update resembles Adam but with different scaling for each parameter.
When running AdaHessian on real models—image classifiers, transformers, and so on—you'll notice a few patterns. The early steps of training can feel slower, especially compared to Adam. However, as the model settles into flatter regions of the loss surface, AdaHessian tends to gain momentum. It isn’t just about reaching a low loss; the optimizer focuses on how stable that low point is.
One thing that stands out is how well it handles architecture depth. Deeper models often come with chaotic gradients and tougher training dynamics. AdaHessian, thanks to its curvature awareness, tends to stay more balanced in these settings. It adapts well across different model sizes and retains stable behavior, even when batch sizes shift, or layers grow deeper.
Models trained with AdaHessian frequently end up with validation metrics that are on par with or better than Adam's, and they tend to need fewer epochs to get there. The overall feel is that the optimizer "understands" the shape of the loss space more clearly, which can translate into better decision-making as training progresses.
There's no clear winner between the two. It depends on what you're optimizing for—speed, generalization, stability, or simplicity. But here's a direct look at how they differ in core behavior.
Feature | Adam | AdaHessian |
|---|---|---|
Type | First-order | Second-order (approx.) |
Uses Hessian? | No | Yes (diagonal approximation) |
Memory Cost | Low | Slightly higher |
Speed per step | Fast | Slower per step but needs fewer steps overall |
Sensitivity to learning rate | Medium | Lower |
Generalization | Good | Often better |
Hyperparameter tuning | Needed | Still needed, but it is less sensitive |
Batch size handling | Can vary | More stable |
If you're working with a small model or training quickly, Adam still works well and is simpler to manage. But if your model is deep or your dataset noisy, AdaHessian might handle the instability better. Especially in cases where overfitting is a concern or generalization needs a push, it’s worth trying.
AdaHessian doesn't replace Adam, but it does offer an alternative path that's more aware of how steep or flat the lost landscape is. If you've hit a plateau with first-order methods or noticed that your model does great on training but stumbles on validation, this might be what's missing. The second-order insights it brings are subtle but effective, especially in deeper architectures where standard optimizers start to wobble.
Try it on one of your existing models without changing much else. The difference won't always be dramatic—but when it works, it does so in ways that show up where it matters: better stability, improved generalization, and fewer training epochs.
Advertisement

Applying to the Big 4? Learn how Overleaf and ChatGPT help you build a resume that passes ATS filters and impresses recruiters at Deloitte, PwC, EY, and KPMG

Learn here key security challenges and practical solutions for protecting AI and edge computing systems from cyber threats

Curious about how to bring custom GPTs into your ChatGPT conversations with just a mention? Learn how GPT Mentions work and how you can easily include custom GPTs in any chat for smoother interactions

Enhance your ChatGPT experience by using the Wolfram plugin for fact-checking, solving STEM tasks, and data analysis.

Wish you had a smarter way to learn games or create images? ChatGPT’s “My GPT” bots can help you do all that and more—with no coding or tech skills required

Struggling to keep up with social media content? These AI tools can help you write better, plan faster, and stay consistent without feeling overwhelmed

Curious about CodeGPT? Learn what CodeGPT is, how it works, and whether it can really write code that runs. Simple guide for beginners and curious minds

Confused between Git reset and revert? Learn the real difference, when to use each, and how to safely undo mistakes in your projects without breaking anything

Wondering how people actually get good at working with large language models? Start with these seven straightforward steps that show you what matters and what doesn’t

Ever wondered how you can make money using AI? Explore how content creators, freelancers, and small business owners are generating income with AI tools today

Empower sales teams with AI-driven automation, data insights, and personalized strategies to boost staff performance and results

Trying to manage project timelines more easily? Learn how to create clear, customizable Gantt charts in Python with Matplotlib and Plotly, no expensive tools needed